

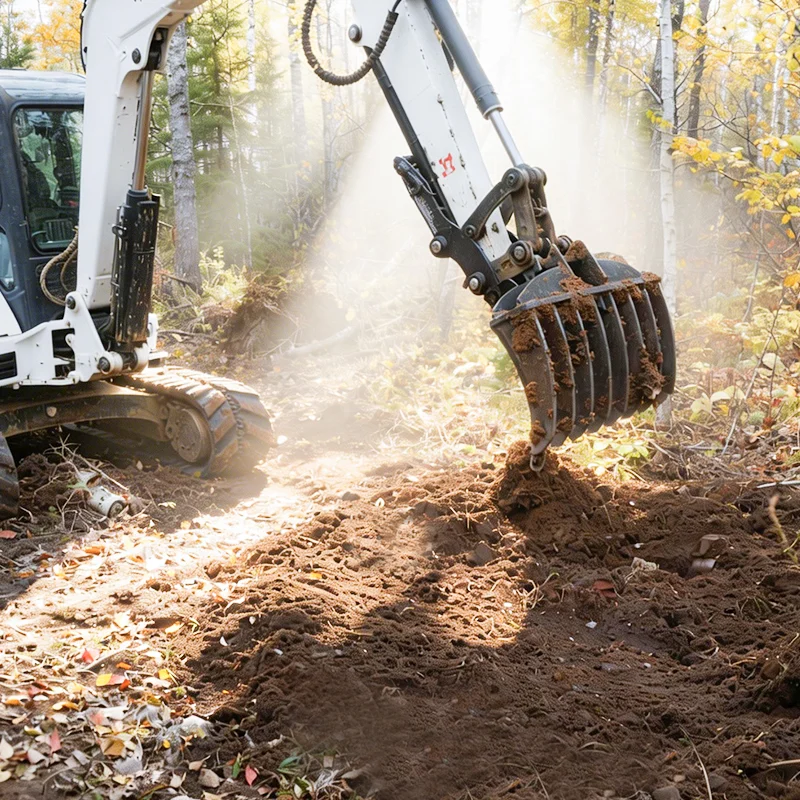
Shank Design Determines Penetration
An excavator ripper's ability to penetrate hard material — rock, frozen soil, compacted clay — depends entirely on its shank design: the shape, length, and geometry of the single pointed shank that digs into the material. Get the shank design wrong and you either cannot penetrate hard material, or you waste machine power lifting and dropping the ripper without making progress.
Shank geometry for excavator rippers follows the single-tooth design: a heavy steel shank (typically 100–200 mm square cross-section) that tapers to a pointed tooth at the bottom. The shank is mounted to the excavator arm via a linkage that allows it to pivot up and down, and the excavator's arm force pushes the shank downward into the material. The shank's angle (rake angle) is critical — typically 30–45 degrees from vertical. Too shallow and the shank skates along the surface without penetrating; too steep and the shank digs too deeply and gets stuck. Quality rippers use a replaceable tooth point (bolt-on, 200–300 mm long) that takes the wear and abrasion — when the point wears blunt, you replace just the point rather than the entire shank.
Shank length and profile affect penetration on different materials. A shorter, stiffer shank (1.0–1.5 m from mounting bracket to tooth tip) provides maximum penetration force — the shorter lever arm transmits more digging force directly to the tooth tip. This is best for hard rock and compacted material where penetration is the challenge. A longer, more flexible shank (1.8–2.5 m) provides greater reach and breakout force — the longer lever arm gives the excavator more mechanical advantage, allowing it to pry and crack rock rather than just penetrate it. For mixed-duty work (breaking up rock ledges, ripping frozen soil, loosening compacted clay), a medium-length shank (1.5–2.0 m) handles most applications adequately.
Shank material and replaceability affect total cost of ownership. Most ripper shanks are made from high-strength alloy steel (typically ASTM A572 Grade 50 or equivalent) that resists bending and cracking under heavy loads. The tooth point (the part that contacts the material) is made from hardened steel (40–45 HRC) that resists abrasion — the point is bolted on and replaceable. When the point wears blunt (less than 30 percent of original tooth height), penetration drops significantly — the shank skates along the surface instead of digging in. Replace the tooth point when it wears to 50 percent of original height — a 30-minute job that restores full penetration. Some rippers offer side cutters (welded or bolted along the shank sides) that protect the shank body from abrasion — they extend shank life by 30–50 percent in abrasive soil conditions.
Penetration Force and Material Types
A ripper's penetration capability depends on the excavator's digging force, the shank geometry, and the material being ripped. Understanding what a ripper can and cannot do prevents wasted effort and machine damage.
Material types a ripper handles efficiently: fractured rock (shale, sandstone, weathered granite), frozen soil (up to 1.5–2.0 m depth), compacted clay (hardpan, caliche layers), and asphalt (road removal). A ripper does not work well on solid, unfractured bedrock (granite, basalt, limestone in sound condition) — for that, you need a hydraulic breaker. The ripper's effectiveness depends on the material's fracture pattern — it works best on material with existing cracks and planes of weakness, which it can exploit to pry pieces loose. On solid rock without fractures, the ripper cannot penetrate — the excavator will just lift its own tracks off the ground.
Penetration force is the combination of the excavator's arm crowd force (the force pushing the arm downward) and the bucket curl force (the force curling the bucket, which on a ripper translates to upward prying force). A 20-ton excavator generates 10–15 tons of arm crowd force and 8–12 tons of bucket curl force — combined with the ripper's lever geometry, this translates to 20–30 tons of penetration force at the tooth tip. This is sufficient to rip through fractured rock and frozen soil, but not sufficient to break solid bedrock. For heavier ripping work (ripping solid rock or very hard frozen ground), you need a larger excavator (30+ tons) with a correspondingly larger ripper.
Ripping technique affects productivity and machine wear. The operator should approach the material at a slight angle (15–30 degrees from perpendicular) and push the shank into the material using the arm crowd force. Once the shank is buried to its full depth, the operator curls the bucket to pry the material loose — the ripper acts as a lever, breaking the material along fracture planes. For maximum productivity, work along existing fractures and weaknesses in the material — the ripper will follow the path of least resistance. Ripping in the same track repeatedly (pass after pass) gradually deepens the cut and breaks the material into smaller pieces. For frozen ground, ripping in early spring (when the top layer thaws but the subsoil is still frozen) is most effective — the thawed top layer provides access, and the frozen subsoil breaks easily along horizontal planes.
Applications: Rock, Frozen Soil and Site Preparation
The ripper's primary role is preparing ground for excavation or construction — breaking up material that a bucket cannot dig directly. This is common in several applications.
Rock excavation and trenching — when excavation reaches fractured rock layers, a standard bucket cannot dig through it. The ripper breaks up the rock into manageable pieces (100–300 mm size), which can then be removed by the bucket or a loading shovel. This is common in road construction (cutting through rock ledges in road cuts), utility trenching (through rock layers), and foundation excavation (in rocky soil). A ripper on a 20-ton excavator can rip 20–50 meters of fractured rock trench per day — roughly 5–10 m³ of rock per hour. Without a ripper, the alternative is a hydraulic breaker, which is slower and produces dust and noise.
Frozen soil excavation — in cold climates, the top layer of soil freezes to 0.5–2.0 meters depth in winter. A standard bucket cannot dig through frozen ground. The ripper breaks up the frozen layer, which can then be removed by the bucket. This is essential for winter construction projects where excavation must continue year-round. A ripper on a 20-ton excavator can rip frozen ground at 10–30 meters per hour (depending on freeze depth) — roughly 5–15 m³ of frozen soil per hour. The ripper works best when the frozen layer is fractured by natural freezing and thawing cycles — freshly frozen soil (just after the first hard freeze) is harder and more difficult to rip.
Site preparation and land clearing — for agricultural land preparation, the ripper breaks up compacted hardpan layers (typically 30–60 cm below the surface) that restrict root growth and water drainage. This is common in converting pasture to cropland, or rehabilitating overgrazed land. The ripper also breaks up asphalt and concrete pavements during road removal — it rips the pavement into manageable pieces that can be loaded and hauled away. Compared to a hydraulic breaker, the ripper removes pavement faster and produces cleaner edges along cuts.
Maintenance That Prevents Shank and Pivot Failure
Three components account for most ripper downtime. First, the tooth point — inspect daily for wear and tightness. A worn tooth point (less than 50 percent of original height) does not penetrate material effectively — it skates along the surface instead of digging in. Replace the tooth point promptly (it is bolt-on, taking 15–30 minutes). Check tooth tightness at the start of each shift — a loose tooth allows the shank to vibrate excessively, causing wear on the mounting bolts and shank structure. For high-abrasion work (ripping on abrasive sandstone or gravel), consider carbide-tipped tooth points that last 3–5 times longer than standard steel points — they cost more upfront but reduce replacement downtime significantly.
Second, the shank and pivot pins — inspect monthly for cracks and deformation. The shank operates under heavy bending loads, and fatigue cracks can develop near the mounting bracket if the ripper is used improperly (prying on solid rock that the ripper cannot break). Inspect the shank visually for hairline cracks — if found, stop using the ripper immediately and replace the shank. A cracked shank can fail catastrophically under load, sending pieces flying. Check pivot pins (which connect the ripper to the arm linkage) monthly for play — any play beyond 3 mm indicates pin or bushing wear. Replace worn pins and bushings promptly. Grease all pivot pins weekly (3–4 pumps per pin) — the ripper operates under heavy, intermittent loads, and inadequate greasing causes rapid pin wear.
Third, the mounting bracket and bucket linkage — inspect monthly for cracks and deformation. The mounting bracket (which connects the ripper to the excavator arm) carries the full prying force. Check for cracks near the welds — if found, have them professionally welded by a certified welder. Never continue using a cracked mounting bracket — it can fail under load, causing the ripper to detach from the arm. Check the bucket linkage pins (if the ripper uses the bucket cylinder for prying) monthly for wear — worn linkage pins allow the ripper to shift, reducing prying accuracy. Keep linkage pins greased weekly.
Choose shank length for your application (stiffer for hard rock, longer for prying), replace tooth points promptly, and inspect the shank and mounting bracket for cracks regularly. That is the formula for a ripper that breaks rock and frozen soil all day — and never fails unexpectedly on the job.